
Google Tag Manager (GTM) is a free tool that allows marketers to quickly and easily add tracking and marketing tags to their websites without the need for code changes. It provides a central location to manage and update tags, making it easier to track and measure the performance of marketing campaigns and website activities.
As a marketer, collecting data is one of the most important parts of your job. Sometimes, you’re collecting data for your website, another time to run a marketing campaign, or to understand your customers better. It’s a never ending process and Google Analytics might be helping you out with it.
But with Google Tag Manager, the process becomes more efficient.
What is Google Tag Manager?
Google Tag Manager (GTM) is a tag management system offered by Google. It allows you to create and manage tags on your website. With GTM, you can add and update tags without needing to write code. As a marketer, you might not be equipped with coding, so GTM eliminates the tedious process of creating tags. Well yes, that’s not it. GTM has a lot to offer.
- Increased efficiency: GTM allows marketers to add, modify, and delete tags without the need for code changes, saving time and resources. It allows greater flexibility and control over your tracking and marketing efforts. It reduces a marketer's dependency on developers to make updates to your website tracking, and you can deploy most of the tags and tracking yourself through the GTM interface.
- Enhanced tracking and measurement: GTM makes it easier to track and measure the performance of marketing campaigns and website activities, providing valuable insights into customer behavior and helping to optimize future campaigns. You can track and analyze user behavior on your website in a more comprehensive way. It can provide you with a more detailed view of how users interact with your website, which will help you make more informed decisions about your marketing campaigns.
- Simplified tag management: GTM provides a user-friendly interface for managing and updating tags, making it easier for marketers to add and modify tracking and marketing tags.
GTM is free and you can check if it fits your needs or not. So the first step to trying GTM is to set up an account. Let’s see how you can create your GTM account.
How to set up your GTM account?
The process of setting up a Google Tag Manager (GTM) account is divided into a few steps. Here’s how you can set up your account:
- Create a GTM account: Go to https://tagmanager.google.com/#/home and click on the "Sign Up" button. Enter details such as your account name and country.


3. Install the GTM tracking code: Once you have created a container, you will be given a GTM tracking code. This code needs to be installed on every page of your website or app that you want to track. The code should be placed in the header of your website or app, immediately after the opening <body> tag. You can choose to do this now or later as well. Once you’re done, click “ok” and your Google Tag Manager account is finally set.

The next step requires you to create tags. But before moving forward to learn how you can create tags, let’s first understand what tags are.
What are Google Tags?
In technical terms, tags are snippets of code that are used to track user behavior or gather information from a website or mobile app. For instance, you want to know how many visitors are arriving on your page. You also want to know how long they are staying on your website if they are filling in the form or not, and which links they are clicking.
Learn about tagging best practices in our blog here.
You can create a tag for anything you want to know. In GTM, tags are added and managed through the GTM interface. They can be easily added, modified, or removed without the need to update the code on the website or app. The only thing you need to do is embed a code once on your site - every time you want to create a tag, Google Tag Manager embeds and codes it for you.
But knowing Google tags isn’t enough. There are other vital elements that you need to be familiar with: triggers and variables.
Triggers: A trigger is a set of conditions that determine when a tag should fire. It checks your website or app tries to detect the condition and asks tags to fire. For example, you can create a trigger that fires a tag when a user completes a purchase on your website, or when a user views a particular page on your website. Triggers can be based on specific events, such as clicks or form submissions, or on more complex conditions, such as specific URLs or user behavior.
Variables: In triggers and tags, variables are used to filter when a particular tag should be triggered. It works somehow differently for both, triggers and tags. In triggers, variables are responsible for telling the trigger when to fire the tag. And in the case of tags, variables are the ones that define the exact data the tag should collect.
You can easily create tags, triggers, and variables in your GTM account. So now you’ve become familiar with tags and their other parts. It’s time to move on to see how you can create tags.
How to create tags?
Without tags, there is no point in setting up a Google Tag Manager account. The next thing you want to do right after setting up a GTM account is to learn how to create tags. Let us take you through the whole process step by step:
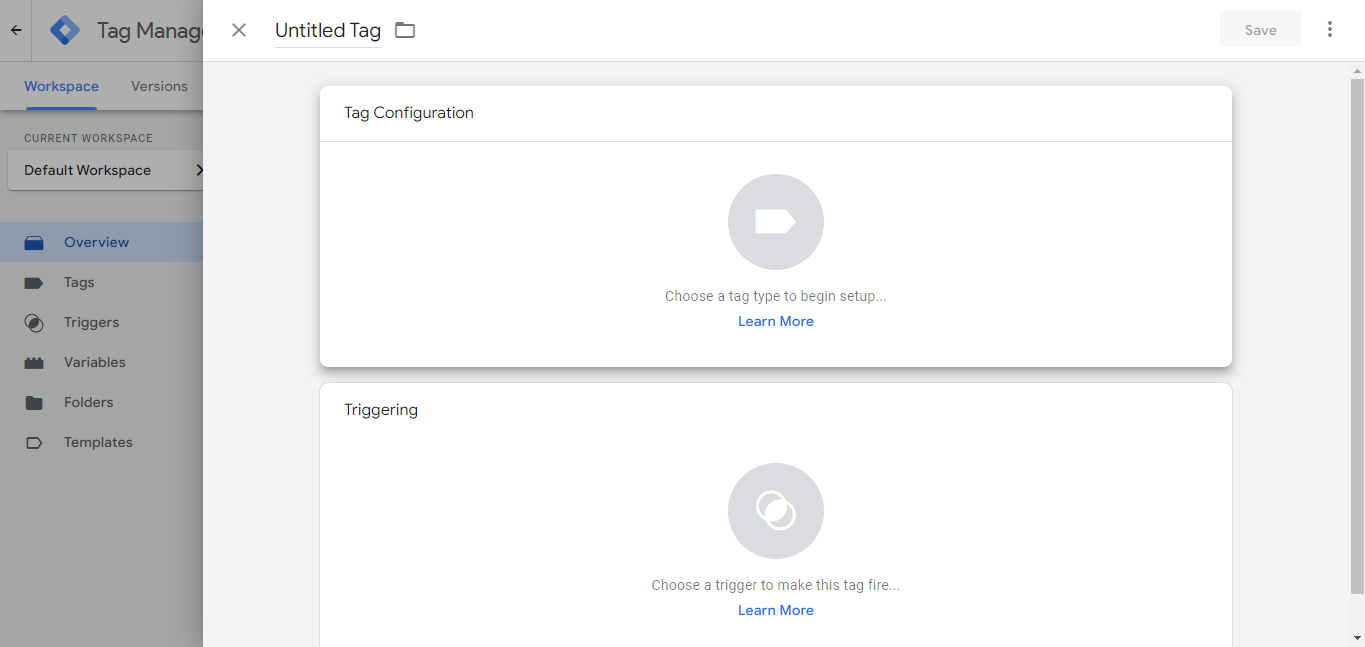
- Go to your Google Tag Manager dashboard and select the "Add a new tag” button.

- The next step requires you to configure your tag. Give a title to your tag, and then click on the “Tap configuration” box to choose a tag type.
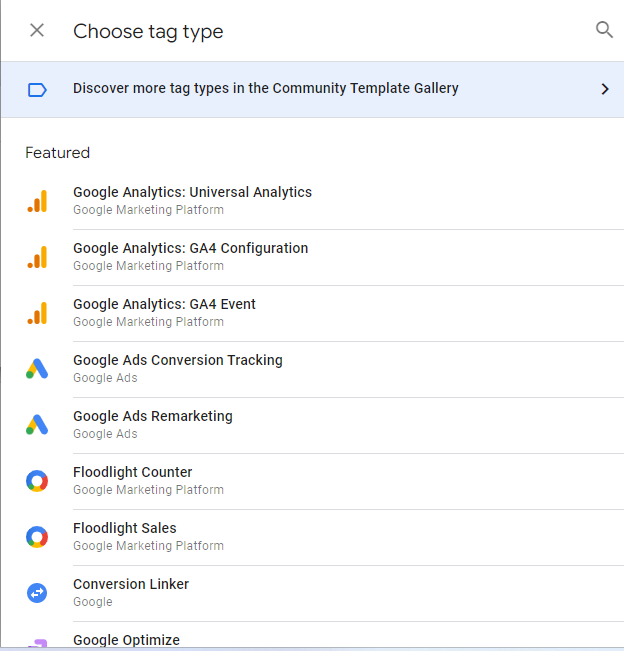
- You’ll see a list of dozens of tag types. Choose the one you want your tag to be linked with. We are going with Google Analytics: GA4 configuration.
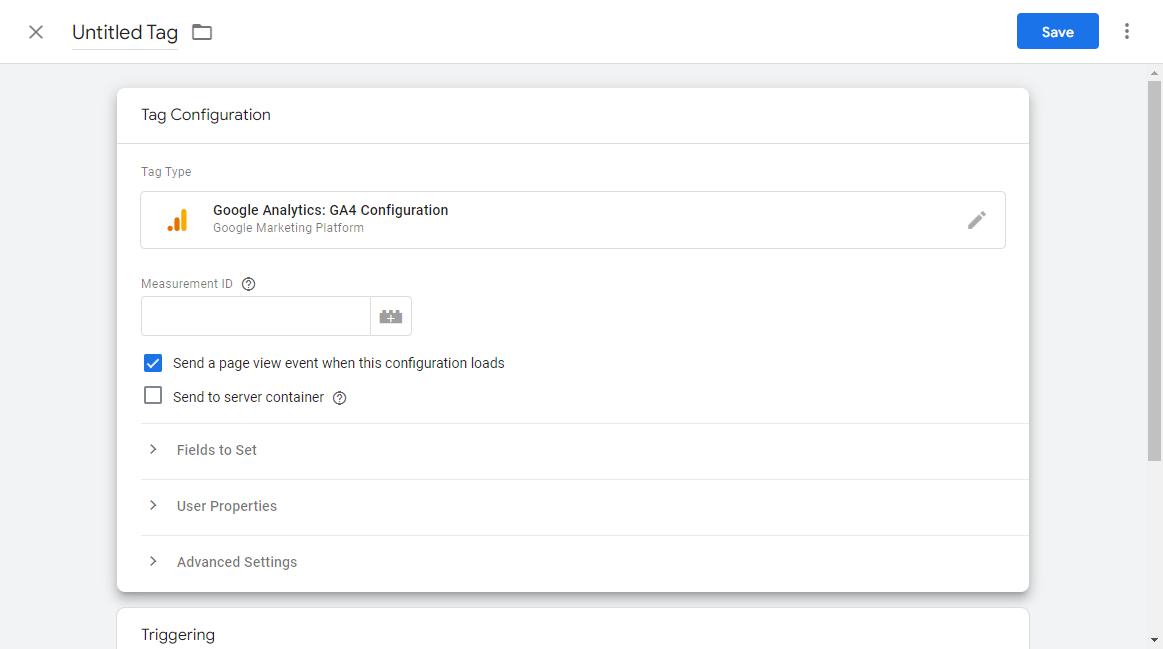
- The next step is to link your tag to Google Analytics: GA4 configuration tracking. Add your “Measurement ID”. You can select Server container if you want to send all events to a specified server container instead of Google Analytics.
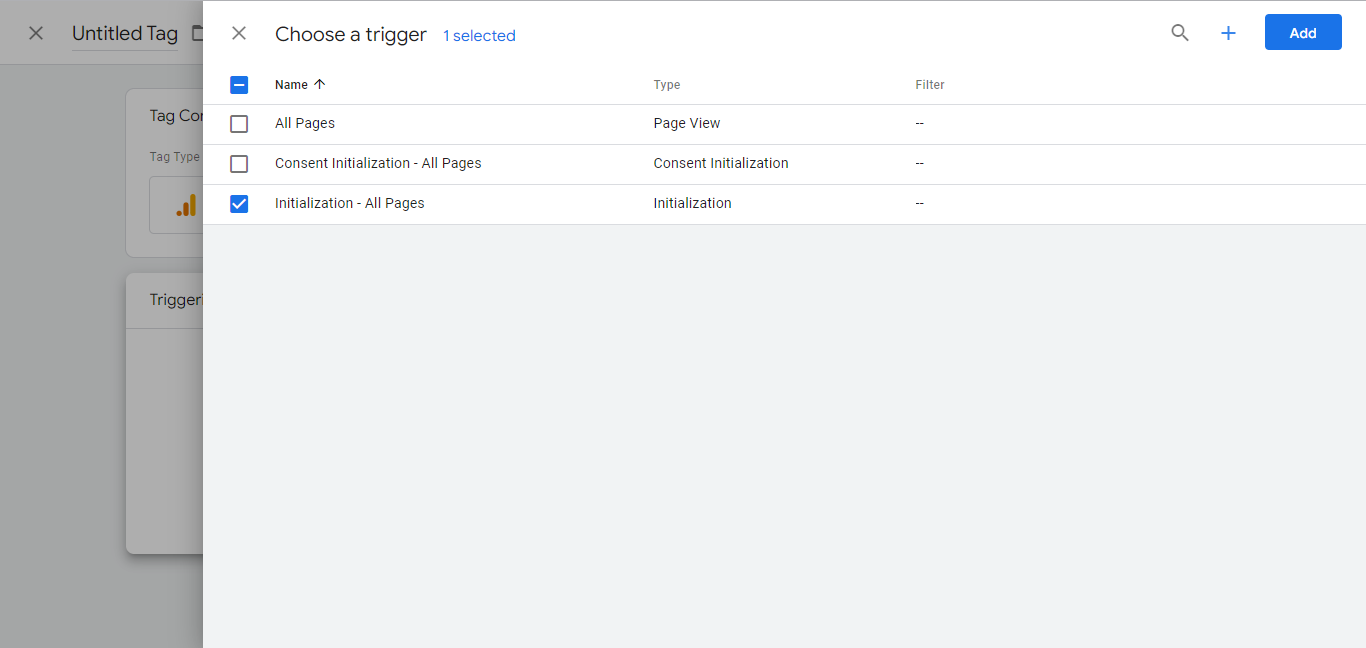
- Next, you need to choose a trigger. Select “Initialization - All Pages” and click on “Add”. After finalizing all the information, save the tag configuration.
And you’re finally done creating your tag. Now all you need to do is to publish the tag so that it can start collecting data. But before publishing it, it’s important to test the tag and debug if there’s any issue. So let’s see how you can test and debug the issue.
Testing and debugging
You can test your tag through GTM easily. Here’s how you can do that:
- Go to your GTM account dashboard, and click on the “Preview” button at the top right-hand side.

- You’ll be redirected to a page where you’ll be asked to put your website URL.

- You’ll have to check if the Google Analytics: GA4 Configuration fired or not. If not, then check the settings and close preview mode. Once you’re done debugging the issue, you’re ready to publish your tag.
Here’s how you can publish your tag:
- On your dashboard, you’ll see the “Submit” button, click on that.

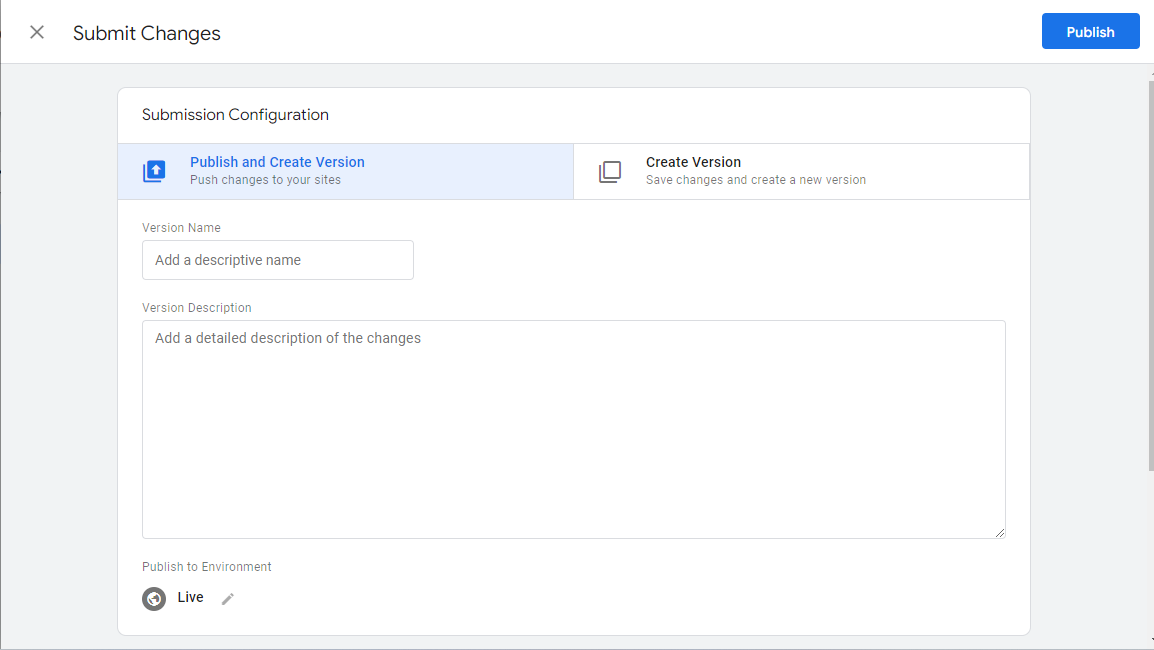
- You’ll be redirected to the “Submission Configuration” page. You’ll be given two options to choose from: Publish and create version, and create version. If you are ready to publish your tags, then you can choose “Publish and create version” and then click on “Publish”. We’re also going with the same.
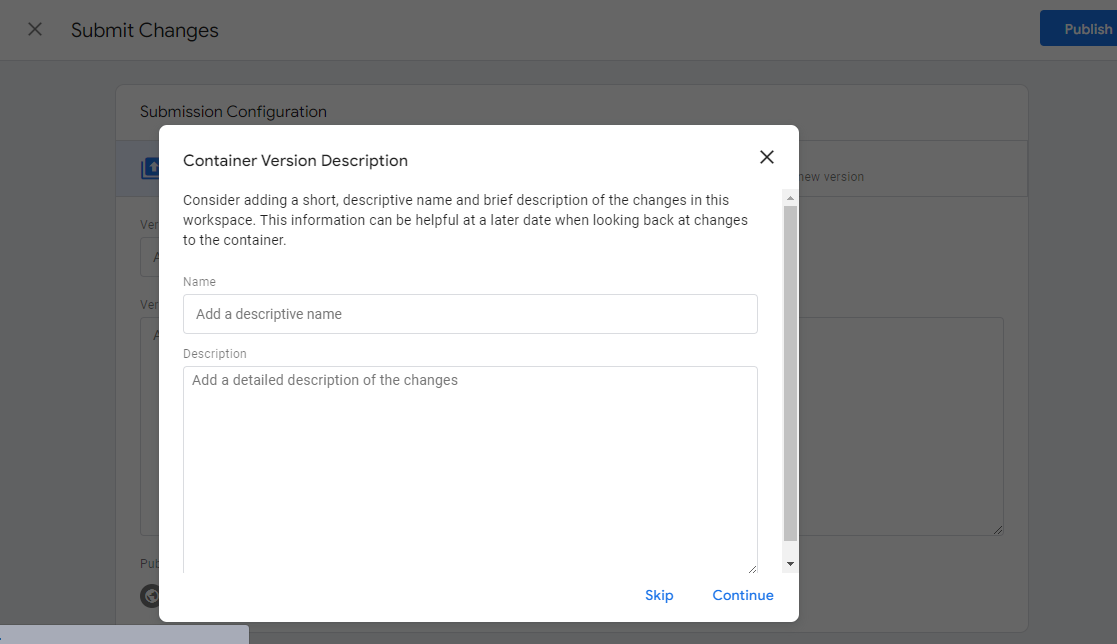
- Then you’ll be taken to this “Container Version Description”, where you’ll be required to add Name and Description. Once you add these details, then click on “Continue”. And voila, you’ll be done.
Now you know how to create, test, and publish tags. However, even after knowing how to manage tags, marketers sometimes have difficulties managing them. You can take the help of extensions. There are a variety of extensions out there that you can install to help you manage tags.
Extensions for GTM
Google Tag Manager extensions can help you set up your GTM and debug issues quickly. There are many GTM extensions out there, but here are 3 of the most popular:
- Google Tag Assistant: Tag Assistant is a Google Chrome extension that allows you to check which tags are firing on your website or app. It gives you suggestions if there are any errors and allows you to troubleshoot them.
- GTM Debug: GTM Debug allows you to see the data layer and all the tags that have fired on a page. You can check if your variable values are correct and troubleshoot if any errors occur.
- Tag manager injector: Tag Manager Injector is similar in its function, just like Tag Assistant and GTM Debug. Moreover, it works on pages you don't have access to or even on those without Tag Manager container codes.
Extensions can make your workflow easy and help you with Google Tag Manager and Google Analytics as well.
Conclusion
Google Tag Manager is a powerful tool that allows marketers to easily add tracking and marketing tags to their website. By setting up GTM and creating tags, triggers, and variables, you can track and measure the performance of your marketing campaigns and website activities. Don't forget to test and debug your tags to ensure that they are functioning correctly.
If you need help implementing GTM or analyzing the data it collects, the team at Analytico is here to help. Our team of digital analytics experts can help you get the most out of GTM and other digital analytics tools. Contact us today to learn more about our analytics services.