Google Analytics 4 has introduced many changes, and it can be a challenge to adapt to them. One major change is in the GA4 data model. The GA4 data model is event-based, which means that every interaction or ‘hit’ is an event. This data model enables more flexibility to tracking your events.
Google Analytics collects some events automatically when you set up the Google Tag or the Tag Manager snippet on your website. GA4 enables you to customize your events and parameter data for your use case. This helps you create specific conversion events that are relevant to your business.
In this article, we will discuss how to create events in GA4 via the user interface.
Create an Event
One reason to create a new event from an existing one is to be more specific. For example, website visitors trigger the page_view event when they view any page. If you want to track page visitors for a specific landing page separately then you can create a new event from the page_view event and fire it every time a visitor views that page.
To create an event in Analytics first determine which event you want to base it on. Identify the parameters the existing event uses then choose the conditions that will trigger the new event. Let’s take a step-by-step look at how you can create new events in GA4.
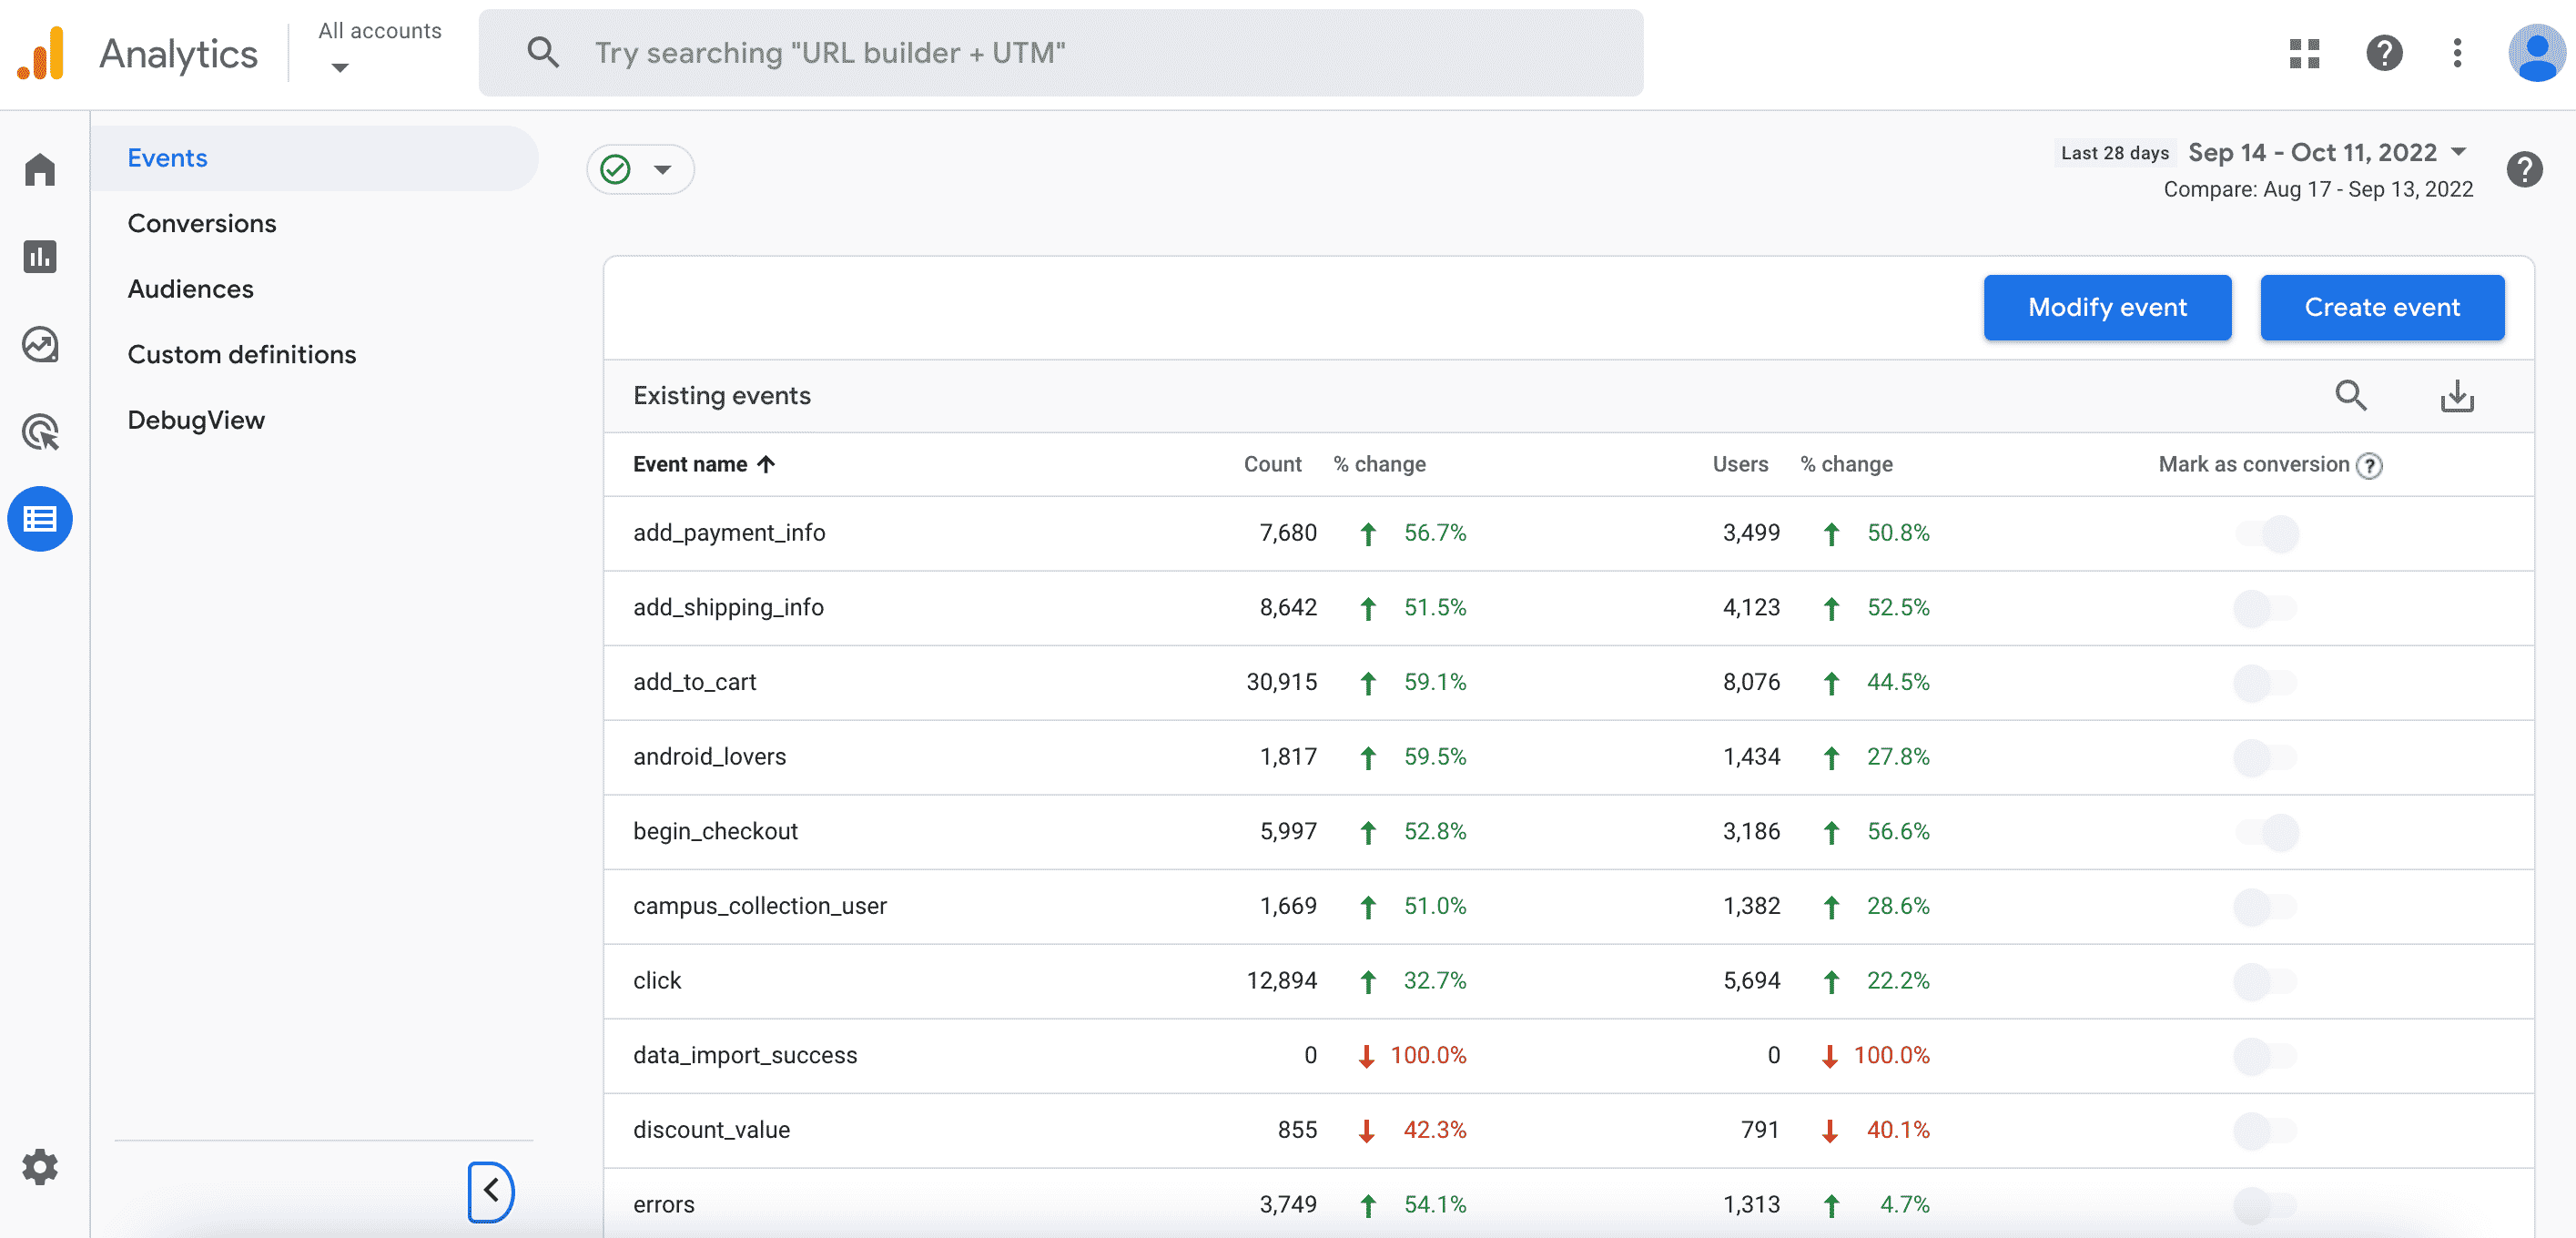
Click to “Create Events”
In the left pane, click on the Configure option and go to Events. On the top right corner click on Create Event. You will be taken to the Custom events screen where you can configure the event.
Configure the new event
This is the screen where you can configure your new event. Start by giving your new event a unique name. Next enter the matching conditions. First, specify the event you want to base the new event on. Then specify additional conditions that will distinguish the new event from the rest.
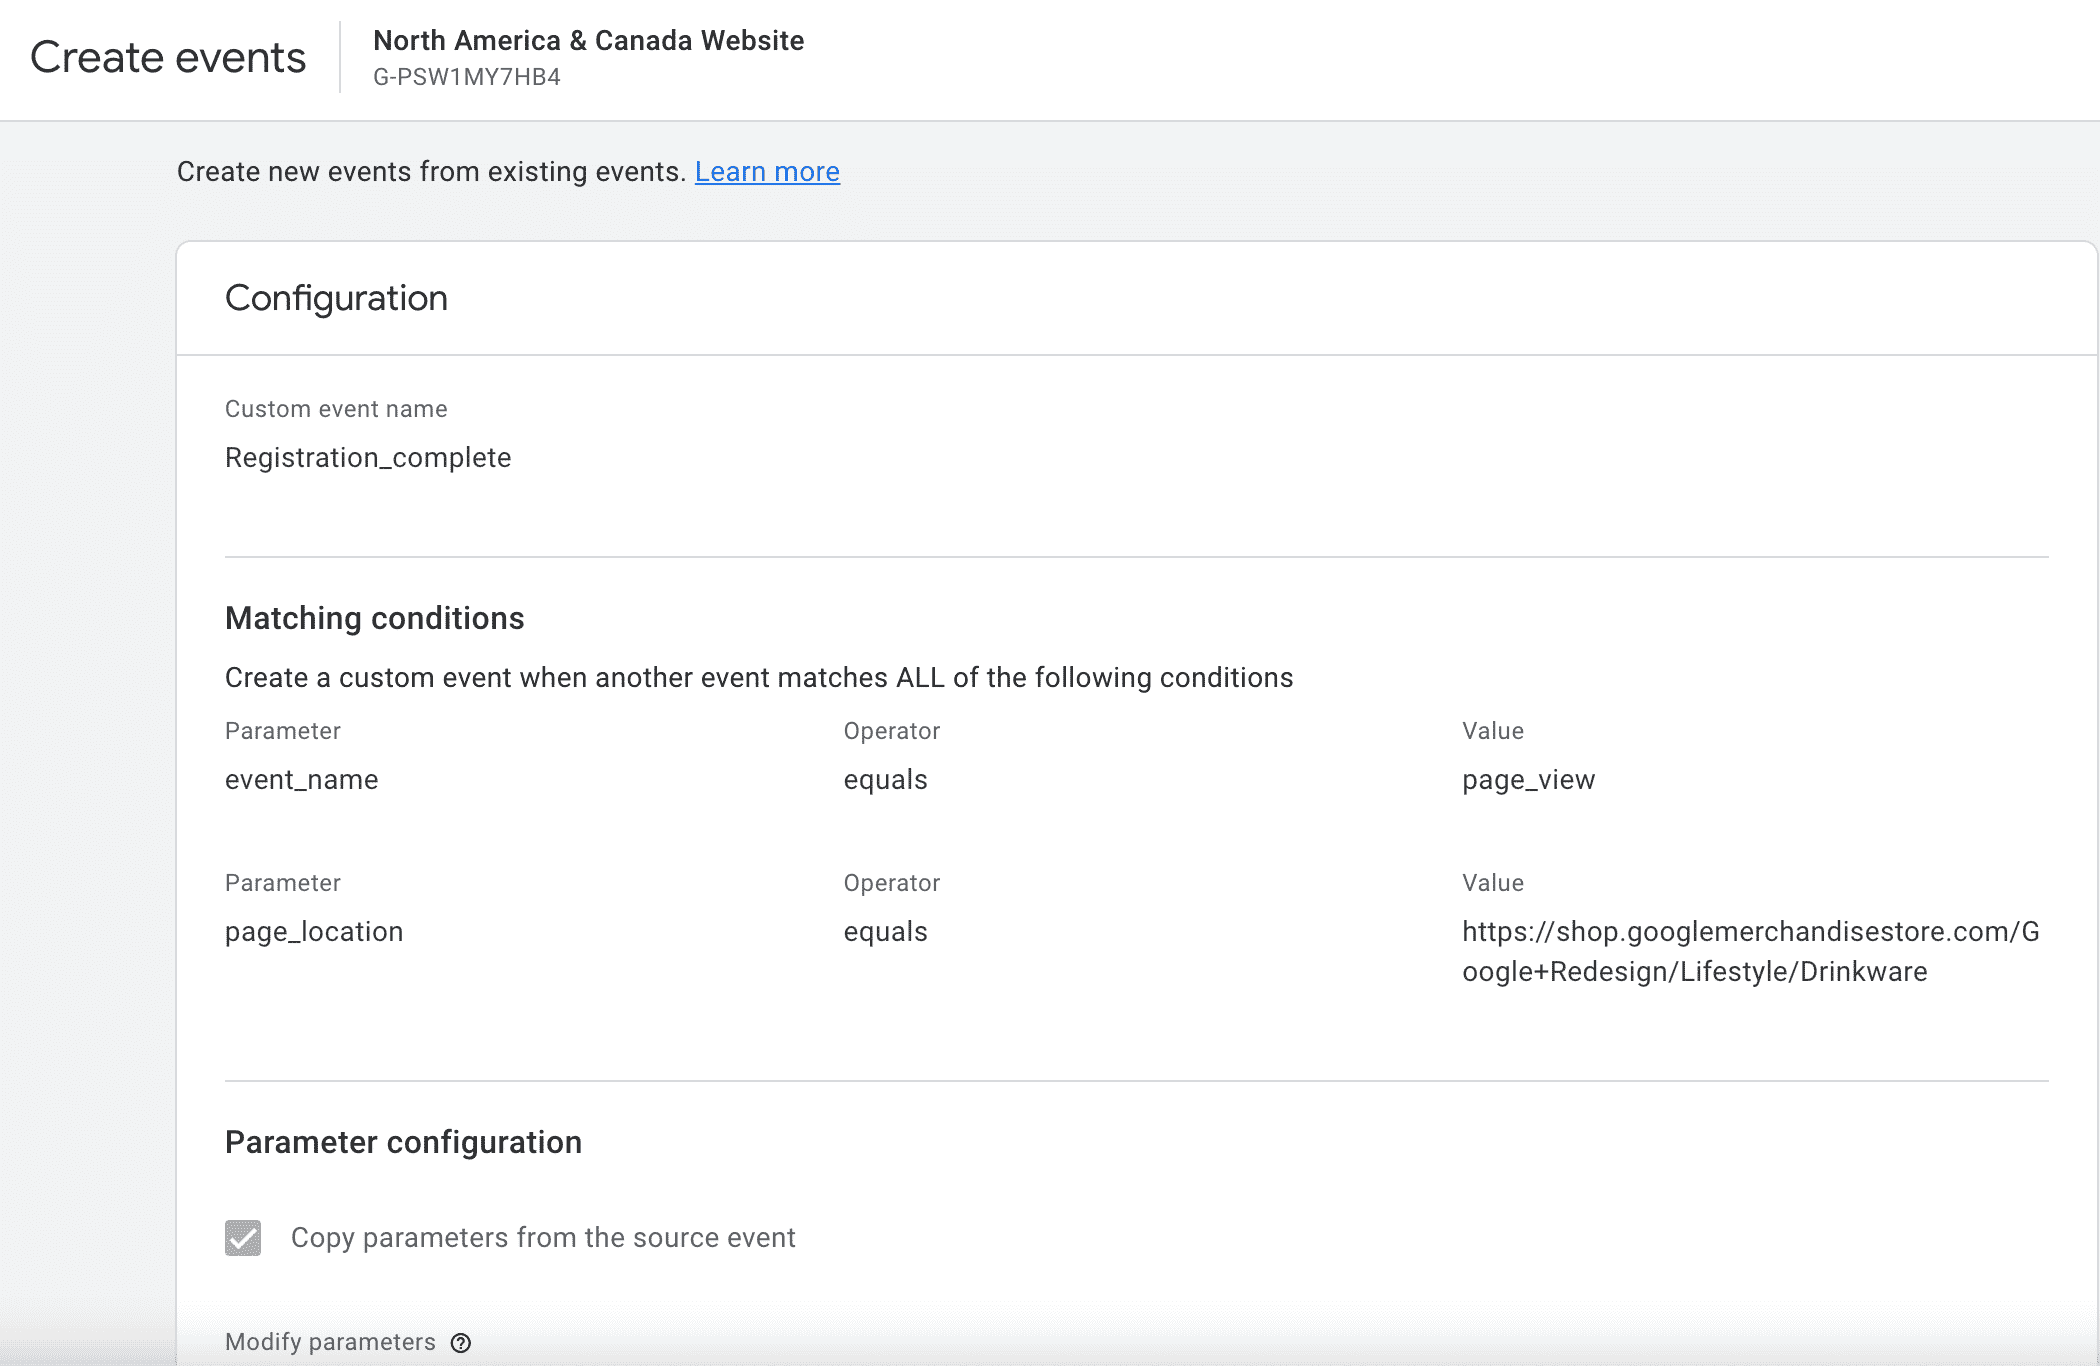
Next, choose parameters configuration. If you want the parameters from the original event then choose “Copy parameters from source event”. Otherwise, you can create additional parameters for the new event you create.
After that click on Save.
Test the new event with Realtime
The last step is to confirm that your event is firing successfully. If you have created an event specific to a page in your website, navigate to that page. This should trigger the new event that you have created. You can find your new event in the Realtime report in GA4. This way you can confirm that your new event is firing as intended.
Mark new event as Conversion
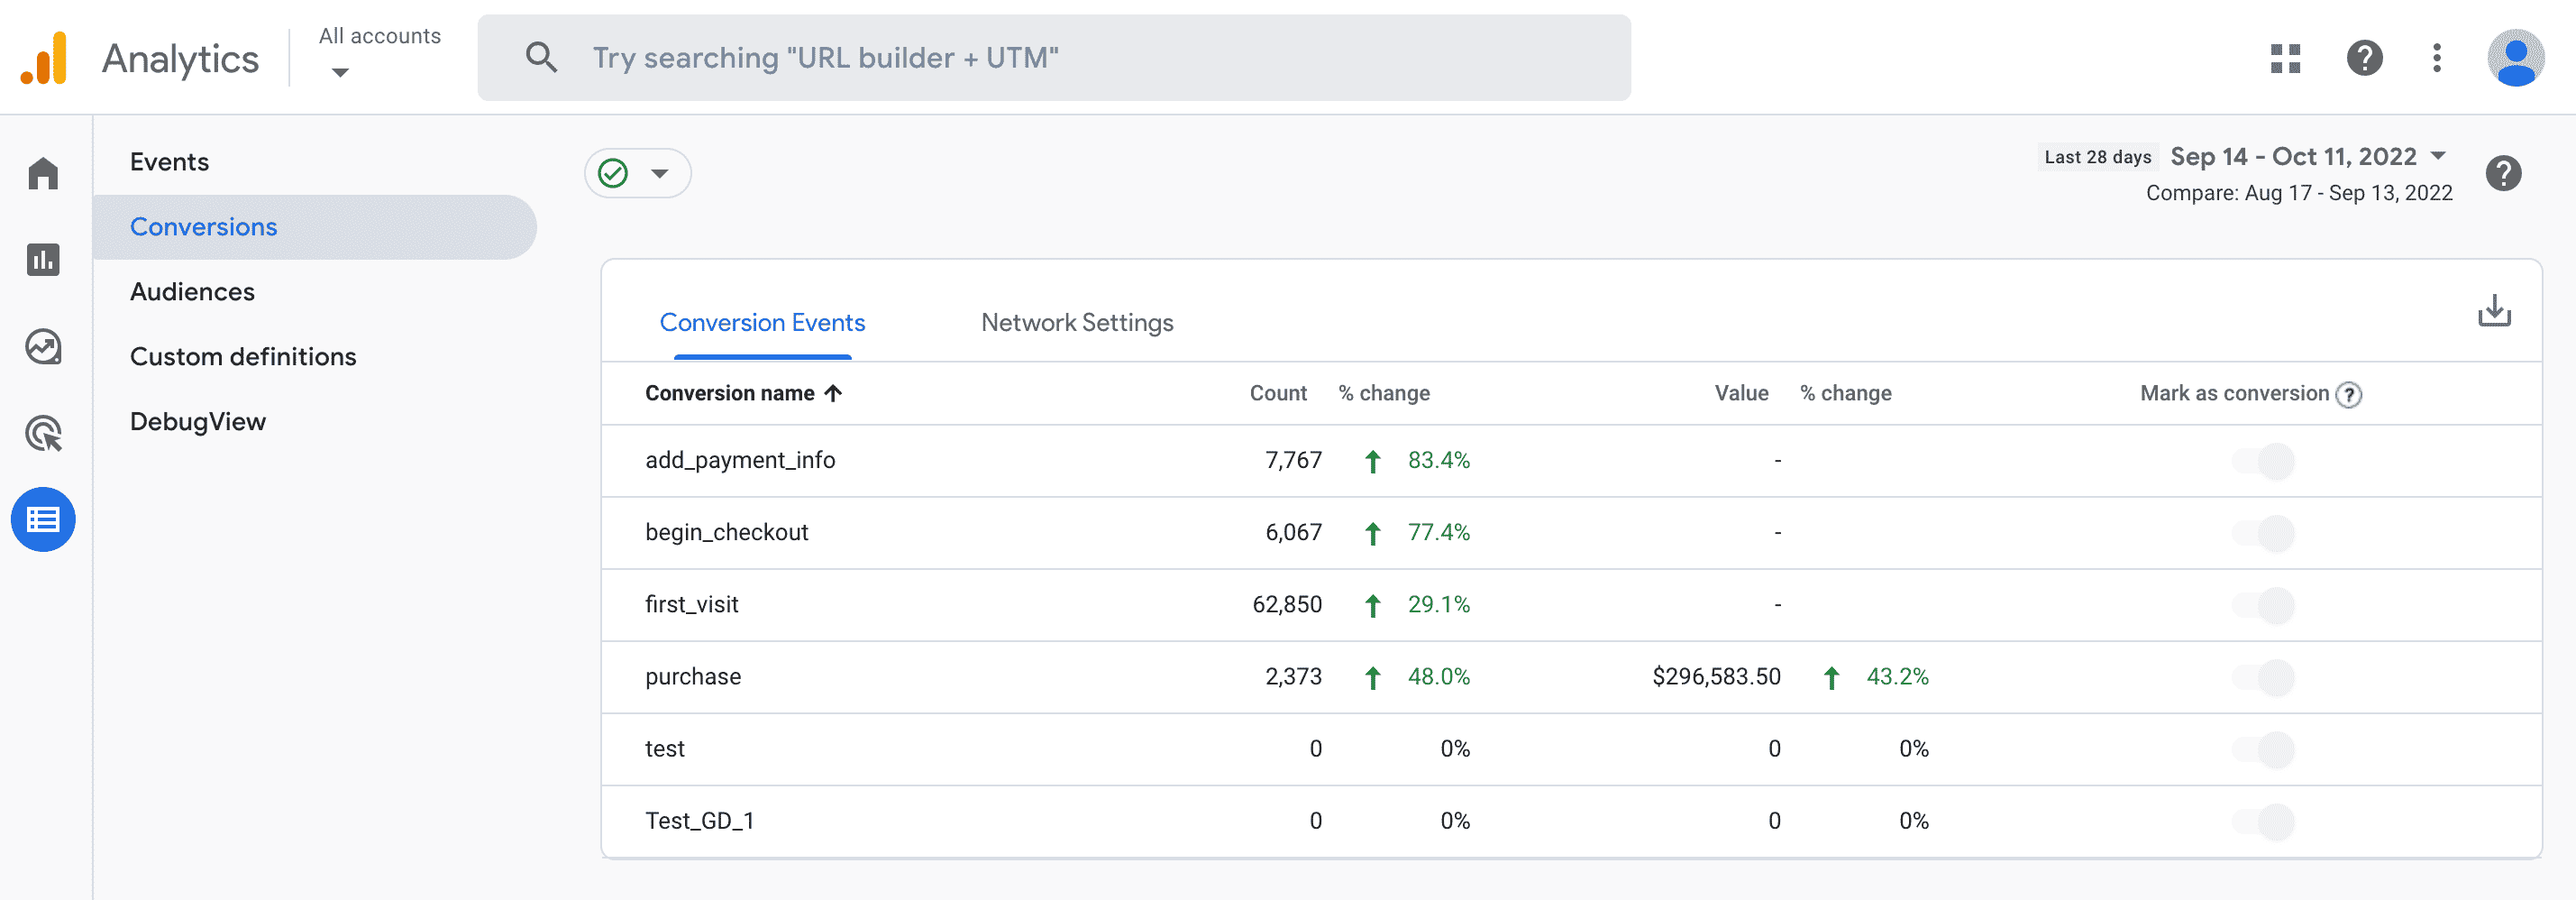
To measure conversions, you can select events that are relevant to your business and mark them as conversion events. There are two ways to do this. First, you can wait a day until your events table is updated and the new event appears in the Events report where you can mark it as conversion. Or you can navigate to the Conversions report and create a new conversion. Name the conversion exactly what you named the new event that you created.

These are the steps that you need to follow to create a new event via user interface.
Here are some event naming rules you need to know.
Event Naming Rules
- Event names are case sensitive. For example, my_event and My_event will be two different events
- Event names must start with a letter. Use only letters, numbers and underscores. So not use spaces
- Event names can include English and non English letters and words
- Do not use reserved prefixes and event names
Modify An Event
Modifying an existing event means overwriting it. Be careful when modifying an event someone else has created. Before you modify any event, consider which parameters the existing event uses and how you want to modify it.
To modify an event you go to Events and “Modify Event”.
Limitations
Events that you configure have limitations. These are the limitations you need to be aware of:
- Modified and created events do not apply to historical data
- You can create up to 50 events and modify up to 50 events based on existing events
- Modifications take up to an hour or more to apply
- Modifications are implemented client side before the data is sent to Analytics for processing
- Modified events are executed in the order they appear in the Events modifications list
- Modified events are processed before created events are`processed
- It is not possible to reorder created events
- You cannot create or modify events based on parameters from the items array when you use gtag.js
Before you create custom events, review the list of automatically collected, enhanced measurement and recommended events. These types of events automatically populate prebuilt dimensions and metrics. Moreover, they do not impact the limits on the number of events and parameters you can create.
Keep in mind the event naming rules when you create a new event. The GA4 event based data model offers more flexibility when it comes to customizing your event that is relevant to your business needs.
Found this helpful? Check out more interesting articles from our blog.